As the crisp November air settles in, many gardeners begin to wind down for the season, packing away tools and letting beds rest until spring. But here’s a little secret: November isn’t the end; it’s actually a prime time to plant cool-season crops that thrive in chilly temperatures. With a bit of planning, your garden can keep producing fresh, vibrant vegetables through the winter. Here’s a look at some of the best vegetables to plant in November, even if winter’s chill is just around the corner.
1. Spinach: A Hardy Green with a Sweet Side
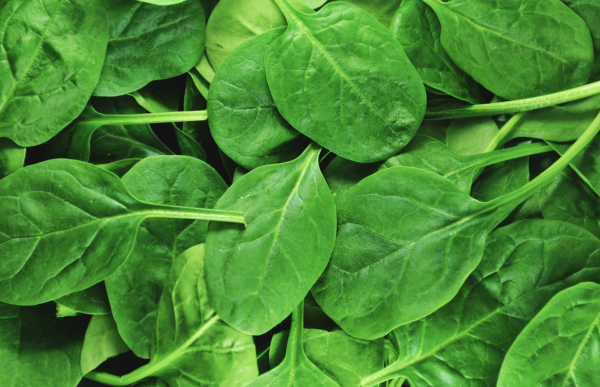
Spinach is one of those super greens that love the cool weather. In fact, a light frost can actually enhance its sweetness! When I first discovered this, I was amazed at the difference it made to my salads. Planting spinach in November gives it a jump-start, so by early winter, you’ll have tender leaves ready to pick. I recommend sowing seeds directly in well-drained soil, and be sure to give them a bit of cover if a hard frost is expected.
Here are steps on growing spinach
- Choose the Variety and Prepare the Soil: Select a cold-hardy variety, especially if you’re planting in late fall. Spinach thrives in well-drained soil rich in organic matter. Loosen the soil about 12-18 inches deep, add compost, and make sure the pH is between 6.0 and 7.5.
- Sow the Seeds: Plant spinach seeds directly in the ground about ½ inch deep and 2 inches apart. Space rows 12-18 inches apart for easy access and airflow. Gently water after planting.
- Cover and Protect from Frost: If heavy frost is expected, cover your plants with row covers or cloches to keep the soil from freezing too deeply. Spinach can handle light frosts, which actually enhance its sweetness.
- Water Carefully: Spinach doesn’t need a lot of water but keep the soil consistently moist. Avoid overwatering or wetting the leaves directly, which can invite fungal issues.
- Watch for Pests: Check occasionally for aphids or signs of fungal disease. For aphids, spray them off with water or use a natural insecticidal soap.
Harvesting Spinach
For continuous growth, use the “cut-and-come-again” method. Harvest the outer leaves when they reach about 3-4 inches, leaving the central growing point intact to allow new leaves to develop. Regularly picking outer leaves keeps the plant producing, and harvesting after a frost will give you particularly sweet spinach.
2. Garlic: The Gardener’s Winter Gem
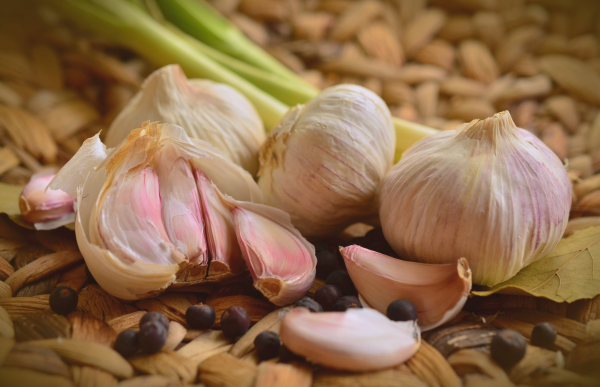
Planting garlic in November feels almost like putting a gift under the soil, one you’ll unwrap in spring or early summer. This crop requires very little attention, and the cold season allows it to develop stronger flavors. Choose large, healthy cloves and plant them with the pointed side up, about two inches deep. Garlic loves a sunny spot with rich soil, so amend your beds if needed.
Here are steps on growing garlic:
- Select Quality Cloves: Choose large, healthy garlic cloves for planting, as larger cloves typically yield larger bulbs. Avoid any cloves with visible damage or disease.
- Prepare the Soil: Garlic thrives in nutrient-rich, well-drained soil. Amend your garden bed with compost or well-rotted manure to ensure it has the nutrients needed for a strong start. Choose a spot with full sun exposure, as garlic grows best with ample sunlight.
- Planting Depth and Spacing: Place each clove about two inches deep in the soil, with the pointed end facing up. Space cloves about 6 inches apart in rows, leaving around 12 inches between rows. Planting too close together can lead to competition for nutrients, resulting in smaller bulbs.
- Mulch for Winter Protection: Cover the planted cloves with a layer of straw or mulch about two to four inches thick. This insulates the soil, protecting the cloves from harsh winter temperatures and helping to prevent weeds from taking hold.
- Watering: Garlic doesn’t require frequent watering over winter. After planting, water just enough to settle the soil, then hold off until the soil starts to dry out in the spring. Once growth picks up, you can resume regular watering, but avoid waterlogged soil, as garlic can be sensitive to overwatering.
Spring Care and Harvesting
- Spring Growth: In early spring, watch for green shoots to start pushing through the mulch. This is a sign that the cloves have taken root and are beginning to grow. At this point, you can remove some of the mulch to allow more sunlight to reach the shoots, but keep some in place to retain moisture.
- Remove Scapes: In late spring, many varieties of garlic will produce tall, curly stems called scapes. Cutting off these scapes directs the plant’s energy back into bulb formation, resulting in larger, more flavorful garlic bulbs. (Plus, scapes themselves are edible and add a mild garlic flavor to dishes.)
- Harvesting: Garlic is typically ready to harvest in early to mid-summer when the lower leaves begin to yellow and die back, but the upper leaves remain green. Gently dig around the bulb to lift it from the soil, taking care not to damage it.
- Curing: After harvesting, cure the garlic by laying it in a warm, dry place with good airflow for about two to three weeks. This helps preserve it for long-term storage, allowing you to enjoy your garlic for months to come.
Planting garlic in November is like setting up a “winter gem” that will reward you with a robust, flavorful harvest come summer. By following these simple steps, you’ll find garlic to be a low-maintenance, high-reward crop that can easily become a staple in your garden year after year.
3. Radishes: Quick and Satisfying
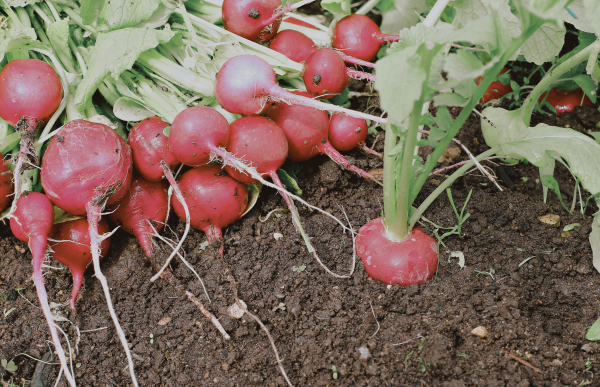
Radishes are my go-to for a fast, satisfying winter crop. They mature in just three to four weeks, so planting them in early November can give you a fresh harvest even as temperatures drop. I love the little pop of spice they add to my winter dishes! Plant radish seeds about half an inch deep, spaced one inch apart, and keep the soil consistently moist.
Radishes are one of the quickest and easiest winter crops to grow, perfect for gardeners looking for a speedy harvest with minimal effort. Here’s a detailed guide to planting, growing, and harvesting radishes, particularly in cool seasons.
Here are steps on planting radishes
- Choose Your Radish Variety: If you live in a mild winter area, try planting several types of radishes for diverse flavors and textures. Common varieties like Cherry Belle or French Breakfast grow quickly, while winter varieties like Daikon are slower but yield larger, milder roots.
- Prepare the Soil: Radishes prefer loose, well-drained soil with good organic content. Work compost into the soil to create a nutrient-rich base. Avoid adding too much nitrogen, as it can cause the plants to grow more leaves than roots.
- Sow Seeds and Spacing: Plant radish seeds about half an inch deep and space them one inch apart. To allow for air circulation and easy growth, space rows around six inches apart. This close spacing is ideal for radishes, as they don’t need much room to mature.
- Watering: Radishes need consistent moisture to grow quickly and develop tender roots. Keep the soil evenly moist, especially during germination. Avoid waterlogging, as this can lead to splitting and poor root development.
Growing and Care
- Thinning Seedlings: As seedlings sprout (usually within a few days), thin them out if necessary, keeping only the strongest plants at the recommended spacing. This ensures that each radish has enough room to grow to its full size.
- Keep an Eye on Soil Moisture: Radishes grow best when they receive consistent water. Watering in the morning can help prevent the soil from drying out during the day, especially in warmer areas. Lack of moisture can lead to bitter radishes or roots that are too spicy.
- Watch for Pests: Radishes are generally pest-resistant, but you might see flea beetles, which chew tiny holes in the leaves. These don’t typically harm the root, but covering plants with a light row cover can prevent flea beetles if they become a problem.
Harvesting Radishes
- Harvest Promptly: Radishes grow quickly and are often ready to harvest within three to four weeks after planting. Harvest as soon as the roots are about the size of a marble or slightly larger to enjoy their crisp texture and mild spice. Leaving radishes in the ground too long can make them woody or overly spicy.
- Stagger Plantings for Continuous Harvests: To ensure you have a steady supply, plant radish seeds every week or two. This succession planting allows for a continuous harvest throughout the cool months.
- Enjoying Your Radishes: Freshly harvested radishes add a peppery crunch to salads, sandwiches, and even roasted dishes. The leaves are also edible and can be sautéed or added to soups.
Radishes are a fantastic choice for quick winter gardening success. With minimal care, you can enjoy fresh, spicy radishes in as little as three weeks, adding a satisfying pop of flavor to your winter meals.
4. Kale: The Winter Warrior
Kale is a resilient, frost-tolerant green that thrives in the colder months, making it an excellent choice for winter gardening. Here’s a guide to growing, caring for, and harvesting kale to enjoy sweet, tender leaves throughout the season.
Here are steps on planting kale
- Choosing Seeds or Seedlings: If you’re starting late in the season, opt for seedlings, which establish faster. However, if you have mild winters or are planning for a long growing season, you can sow seeds directly into the soil.
- Preparing the Soil: Kale thrives in rich, well-drained soil, so work in plenty of compost or organic matter before planting. Kale prefers a slightly acidic to neutral pH (6.0-7.5). It also grows best in full sun but can tolerate partial shade, especially in warmer climates.
- Planting and Spacing: If sowing seeds, plant them about half an inch deep, spaced about 12-18 inches apart, allowing ample room for air circulation and leaf growth. For seedlings, dig a hole slightly larger than the root ball and place each plant about 18 inches apart.
- Watering: After planting, water the kale thoroughly, then keep the soil consistently moist but not waterlogged. Kale’s large leaves need regular moisture, especially in dry winter conditions, to stay tender and sweet.
Winter Care
- Frost Tolerance and Sweetening: Kale can tolerate frosts and even temperatures down to about 20°F (-6°C). The cold weather stimulates the plant to produce sugars, leading to sweeter leaves. For regions with very harsh winters, cover plants with a light row cover or frost cloth to prevent freezing.
- Mulching: Apply a layer of mulch around the base of each plant to help insulate the roots, conserve soil moisture, and suppress weeds. Mulch also helps moderate soil temperature fluctuations, making kale more resilient through the season.
- Fertilizing: Since kale is a heavy feeder, consider applying a light dose of balanced fertilizer or compost in mid-winter if growth slows. Avoid excessive nitrogen, which can lead to large leaves but poor flavor.
- Watch for Pests: While winter pests are minimal, aphids and cabbage worms may still be present. Check the undersides of leaves and gently remove any pests by hand or rinse with water if necessary.
Harvesting Kale
- Picking Leaves from the Bottom Up: Once the leaves reach about the size of your hand, they’re ready to harvest. Start picking from the lowest leaves, snapping them off near the stem while leaving the central growing bud intact. This encourages the plant to continue producing and ensures a steady supply.
- Regular Harvesting: Regularly harvesting encourages the plant to produce new leaves. Kale can provide continuous harvests through winter and into early spring. Always leave a few upper leaves so the plant remains healthy.
- Using Your Kale: Kale’s versatile flavor shines in winter dishes. It can be enjoyed fresh in salads, added to hearty stews, sautéed with garlic, or blended into smoothies. The frost-sweetened flavor brings a mild, almost nutty taste to recipes, making it perfect for seasonal cooking.
Growing kale through winter is a low-maintenance way to enjoy nutritious, flavor-packed greens. With just a bit of care, your kale plants will keep producing, providing you with fresh leaves to harvest even in the coldest months.
5. Carrots: Sweet Roots for Cool Soil
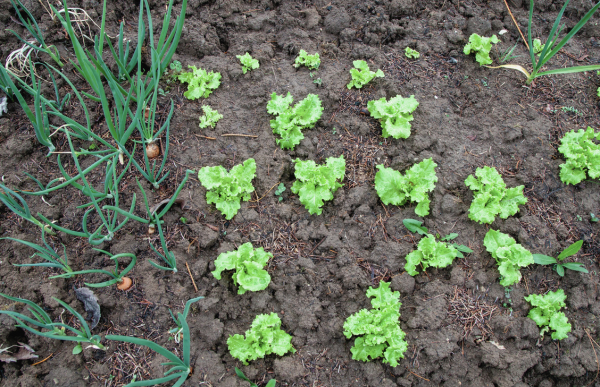
Growing carrots in cool soil can be a rewarding process, especially since they develop a sweeter flavor when grown in colder temperatures. Here’s a step-by-step guide to planting and harvesting carrots in the late fall.
Here are steps on planting Carrots
- Choosing the Right Site and Preparing the Soil: Carrots need loose, sandy soil that’s free of rocks or hard clumps, as these can cause the roots to grow irregularly. If your soil is heavy clay or compacted, consider loosening it deeply and amending it with sand or compost to create a fluffy, well-draining bed.
- Sowing Seeds: Carrot seeds are tiny and need to be planted shallowly. Sow seeds about half an inch deep in rows, spacing them about 2-3 inches apart. It’s easy to sow them too thickly, so try mixing the seeds with a bit of sand for even spacing. After sowing, gently cover the seeds with a thin layer of soil and lightly water them.
- Watering and Patience in Germination: Carrots are slow germinators, and in cooler soil, they can take two to three weeks to sprout. Keep the soil consistently moist but avoid waterlogging. A light layer of straw or row cover can help retain moisture, especially during dry spells. Patience is key, as they’ll take longer to germinate in fall temperatures.
Caring for Growing Carrots
- Thinning Seedlings: Once the carrot tops are about 2 inches tall, thin them to about 2-4 inches apart. Crowding will stunt root growth, so remove the weaker seedlings gently to avoid disturbing the soil around the remaining plants.
- Weeding and Mulching: Keep weeds at bay by lightly weeding around the carrot plants, as they can compete for nutrients. Applying a thin layer of mulch around the plants will help retain moisture, prevent weeds, and insulate the soil, keeping the carrots growing steadily.
- Minimal Fertilizing: Carrots don’t require heavy feeding, especially if planted in nutrient-rich soil. Too much nitrogen can encourage leafy growth rather than root development, so it’s usually best to let the roots focus on absorbing nutrients naturally from the soil.
Harvesting Carrots
- Checking for Maturity: Carrots are typically ready to harvest in about 70-80 days, though cooler temperatures can extend this time slightly. Check by gently digging around the top of the carrot to see its size – most varieties are ready when they’re about ½ to 1 inch in diameter.
- Harvesting in Stages: Carrots can remain in the ground even after they reach maturity, and some gardeners find that leaving them through a few light frosts can enhance their sweetness. Harvest as needed, pulling gently to avoid breaking the root.
- Storing Carrots: After pulling, brush off excess dirt but avoid washing until you’re ready to use them. Store carrots in a cool, dark place or even back in the ground with a layer of straw if you prefer to harvest throughout winter.
Planting carrots in cool soil may require a little patience, but the sweet, flavorful roots are well worth the wait. Carrots thrive with minimal care, making them a perfect low-maintenance crop for fall and winter gardening.
6. Lettuce: The Perfect Pick-and-Eat Crop
Growing lettuce in cool weather is simple and rewarding, providing you with fresh, crisp leaves for salads all winter long. Here’s a step-by-step guide on planting, caring for, and harvesting lettuce.
Here are steps on planting Lettuce
- Select Cold-Resistant Varieties: Cold-tolerant types like Romaine, Butterhead, or Winter Density are ideal for late fall and winter growing. These varieties handle cooler temperatures better and are less likely to bolt.
- Prepare the Soil: Lettuce prefers loose, fertile soil rich in organic matter. Before planting, work compost into the top few inches of soil to improve texture and provide nutrients. Lettuce doesn’t require deep soil, so focus on keeping the top layer soft and moist.
- Sowing Seeds: Scatter lettuce seeds directly onto the soil surface and cover them lightly with about ¼ inch of soil. Lettuce seeds need light to germinate, so avoid burying them too deeply. Space seeds about 4-6 inches apart, or if you’re planting rows, leave about 12 inches between rows for airflow.
- Watering and Germination: Keep the soil consistently moist but not soaked, as lettuce seeds need moisture to sprout. In cool weather, they typically germinate in about 7-10 days. A light row cover can help retain moisture and provide a bit of warmth during chilly nights.
Growing and Caring for Lettuce
- Thinning and Spacing: Once seedlings are about 2 inches tall, thin them to prevent overcrowding and allow room for growth. For full-sized heads, space them 8-12 inches apart. If you’re growing “cut-and-come-again” lettuce, spacing can be a bit closer since you’ll be harvesting leaves continuously.
- Protect from Cold and Frost: Although lettuce tolerates cool weather, temperatures below freezing can harm tender leaves. Use a row cover or frost cloth on particularly cold nights. These covers not only provide warmth but also prevent pest damage.
- Fertilizing Lightly: Lettuce is a light feeder, so avoid excessive fertilization, which can make leaves taste bitter. If needed, a gentle application of a balanced, organic fertilizer can support steady growth.
Harvesting Lettuce
- Harvesting Outer Leaves: Begin harvesting as soon as the leaves are big enough to eat, usually 3-4 weeks after planting. For “cut-and-come-again” varieties, simply snip the outer leaves, leaving the inner leaves and central stem to continue producing. This method encourages new growth and can keep the plant productive for weeks.
- Harvesting Whole Heads: If you prefer full heads, wait until the lettuce reaches maturity (around 6-8 inches tall). Use a sharp knife to cut the head just above the soil line. Many types will regrow small leaves even after being cut, offering a second, smaller harvest.
- Storing and Enjoying: Lettuce is best when eaten fresh, as it can wilt quickly. If you need to store it, rinse and dry the leaves thoroughly, then keep them in a breathable bag in the fridge for up to a week.
Growing lettuce in cool weather is easy and allows for continuous, fresh harvests. With the right care, you can enjoy crisp, homegrown salads even during the winter months.
7. Onions: Slow and Steady
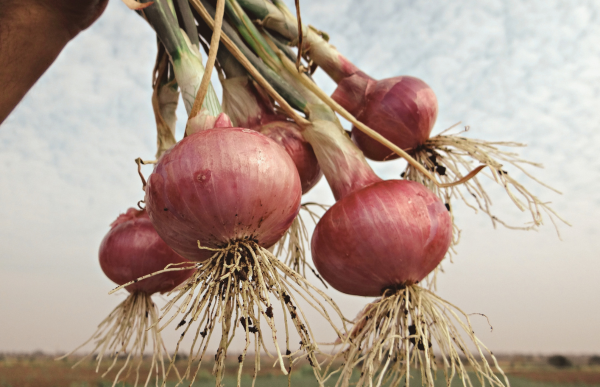
Growing onions is a long-term project that can yield a bountiful spring or early summer harvest. Onions planted in November will establish themselves over winter, resulting in larger, more flavorful bulbs. Here’s a detailed guide to planting, caring for, and harvesting onions for success in the garden.
Planting Onions
- Choosing Onion Sets or Seedlings: Onion sets (small bulbs) and seedlings are both good options for late fall planting. Sets are generally easier to establish in the colder months and tend to mature more quickly. Opt for a winter-hardy variety suitable for your region to ensure the plants can withstand lower temperatures.
- Preparing the Soil: Onions need well-drained, fertile soil, as they dislike soggy conditions. Before planting, loosen the soil and add compost or well-rotted manure to enrich it. Onions also prefer slightly acidic to neutral pH (6.0-7.0), so adjust accordingly if needed.
- Planting Depth and Spacing: Place onion sets or seedlings about an inch deep in the soil, with the pointed side facing up. Space onions 4-6 inches apart in rows, and leave 12-18 inches between rows. Adequate spacing allows the bulbs to expand without crowding each other and improves airflow to prevent disease.
- Watering After Planting: After planting, water the onion sets or seedlings gently to settle the soil. Keep the soil consistently moist but not waterlogged, especially in the first few weeks, as this encourages the roots to take hold.
Caring for Onions Through Winter
- Mulching for Temperature Stability: Cover the soil around the onions with a 2-3 inch layer of straw or mulch to insulate the ground, helping to maintain a steady temperature and retain moisture. Mulching also helps prevent weeds, which can compete for nutrients and slow growth.
- Monitoring Moisture: Although onions don’t require frequent watering over winter, check the soil periodically. Water only if the soil feels dry, as onions are prone to rot in overly wet conditions. In spring, as temperatures warm and growth picks up, increase watering to keep the soil consistently moist.
- Fertilizing in Spring: Once spring arrives, you can apply a nitrogen-rich fertilizer every few weeks to support leafy growth. Nitrogen encourages the tops to grow strong and green, which is essential for energy production as the bulbs begin to swell. Stop fertilizing once the bulbs start to form, as too much nitrogen at this stage can slow bulb development.
- Keeping an Eye Out for Pests and Disease: Onions are generally hardy, but they can be susceptible to fungal diseases in damp conditions. Good spacing, regular weeding, and ensuring soil drainage can reduce the risk of issues like downy mildew. Onion maggots may also be a problem, so monitor the soil and consider rotating crops if you’ve had past issues with pests.
Harvesting Onions
- Watching for Maturity Signs: Onions are usually ready to harvest in late spring to early summer. When the leaves start to yellow and fall over, it’s a sign the bulbs are mature and have stopped growing. At this point, withhold water to help the bulbs cure in the ground.
- Lifting the Bulbs: Carefully dig around each onion and gently lift it from the soil. Avoid pulling the tops directly, as this can damage the bulb. Shake off excess soil and handle bulbs gently to prevent bruising.
- Curing the Onions for Storage: To prepare onions for storage, lay them out in a dry, well-ventilated area out of direct sunlight for 2-3 weeks. This drying process helps the skins harden, extending shelf life and intensifying the flavor.
- Storing Your Harvest: After curing, cut off the tops, leaving about an inch of stem. Store onions in a cool, dry place with good airflow, such as a mesh bag or a well-ventilated basket. Properly cured and stored onions can last for months, adding flavor to meals throughout the winter.
Growing onions is a patient process, but with the right steps, you’ll be rewarded with flavorful, homegrown onions in spring or early summer that add depth and richness to any dish.
Winter gardening may require a bit more planning, but there’s something deeply satisfying about nurturing a garden through the colder months. These vegetables are some of my favorites to plant in November because they don’t just survive – they thrive in the chill. With a little care and a few extra layers of mulch, you can enjoy fresh, homegrown produce even when the world outside seems quiet and still. So bundle up, grab your gardening gloves, and give your garden one last planting session for the season. Happy November gardening!

Leave a Reply